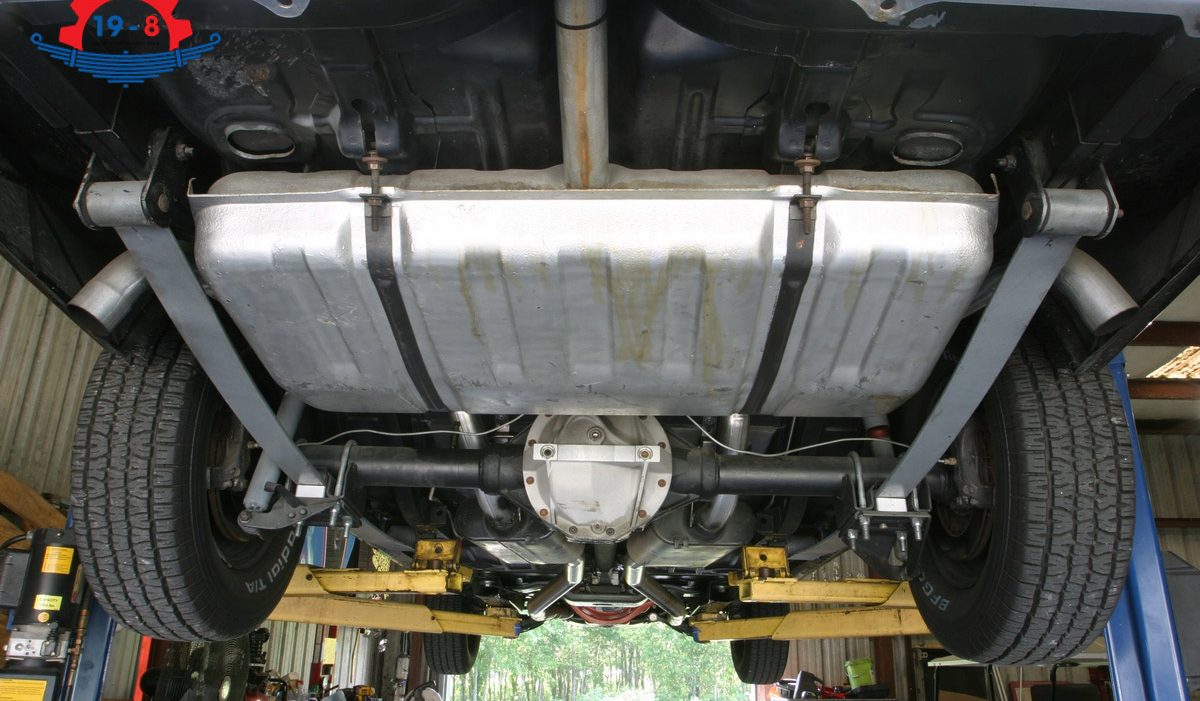
Lowering leaf springs in a vehicle is a popular and effective way to improve its appearance and performance. Lowering a vehicle’s center of gravity can minimize body roll, improve cornering capabilities, and provide a sportier stance. Yet, employing to achieve this demands careful preparation, specific tools, and expertise. In this guide, we’ll walk you through the safe and correct process of your vehicle.


Benefits of Lowering Leaf Springs
They can offer several benefits for your vehicle, such as:
- Enhanced appearance: It can give your vehicle a more streamlined and athletic appearance by minimizing the space between the wheel and the fender. This can also make your vehicle stand out from the crowd and reflect your style.
- Reduced body roll: They can reduce body roll, which is the tendency of the vehicle to lean to one side during turns. By lowering the center of gravity, you can improve the stability and balance of the vehicle and prevent excessive weight transfer.
- Enhanced cornering performance: They can enhance cornering performance by increasing the contact patch of the tires and improving the grip and traction. This can allow you to take turns faster and more confidently without losing control.
Preparing for the Lowering Process
Selecting the Right Leaf Springs
Before embarking on the process, it’s essential to choose them tailored to your vehicle’s specific make and model. Leaf springs, characterized as elongated, flat metal strips, connect the rear axle to the vehicle’s frame, offering both support and adaptability to the suspension system.
To achieve a lowered stance, you’ll need to swap out your current them for shorter variants with a reduced arch. However, not all of them are compatible with your vehicle’s suspension system, so you need to check the specifications and compatibility before buying them. You also need to consider factors like spring rate, load capacity, and ride quality when choosing them.
Gathering Tools and Equipment
Some basic tools and equipment you need to prepare, such as:
- Jack stands: These tools provide support to the vehicle when elevated. A minimum of two jack stands is necessary to stabilize the vehicle’s rear end.
- Wrenches: These are tools that are used to loosen or tighten bolts and nuts. You will need wrenches of different sizes to remove and install.
- Socket set: This is a set of sockets that are attached to a ratchet handle. They are used to loosen or tighten bolts and nuts of different sizes.
- Safety gear: This includes gloves, goggles, and protective clothing. They are used to protect yourself from injuries when working under the vehicle.
- Penetrating oil: This is a lubricant that helps loosen rusted or stuck bolts and nuts.
- New lowering: These are the replacement that you will use to lower your vehicle.
Setting Up the Work Area
Finally, you need to set up a suitable work area where you can safely and comfortably work on your vehicle. You should choose a work area that has:
- Proper lighting: You need enough light to see what you are doing under the vehicle.
- Ventilation: You need fresh air to avoid inhaling fumes or dust from the vehicle.
- Flat terrain: A smooth and level surface is crucial to guarantee the stability of your vehicle when raised.
- Adequate space: You need enough space to maneuver around the vehicle and access all parts.


Step-by-Step Guide to Lowering Using Leaf Springs
Lifting the Vehicle Safely
The first step involves elevating the vehicle’s rear end from the ground. To do this, you need to:
- Park your vehicle on a level surface and apply the parking brake.
- Place wood blocks or tire chocks behind the front wheels to prevent them from rolling.
- Locate the jacking points on your vehicle’s frame or axle. These are usually marked with arrows or symbols on your vehicle’s manual or body.
- Utilize a hydraulic jack to elevate one side of the vehicle’s rear until it’s sufficiently raised to place a jack stand beneath.
- Place the jack stand under the lifting point and slowly lower the hydraulic jack, allowing the vehicle’s weight to rest on the stand.
- Follow the same procedure (as in the previous two steps) for the opposite side of the vehicle’s rear.
- Ensure both jacks stand stably and support the vehicle’s rear end.
Removing the Wheels and Brakes
With the vehicle securely raised, you can now proceed to the next steps:
- Use a wrench or a socket set to loosen but not remove the lug nuts on one wheel.
- Lift one side of the wheel slightly with one hand while holding onto the lug nuts with the other hand
- Remove lug nuts completely by hand
- Pull the wheel off the axle
- Use a wrench or a socket set to remove bolts holding the caliper onto the brake rotor
- Support the caliper with wire or rope so it does not hang from the brake line
- Repeat steps 1 to 6 for the other wheel
Detaching the Old Leaf Springs
Once the wheels and brakes are removed, you can move on to the leaf springs.
- Locate the bolts that secure them to the axle and the frame. There are usually two bolts on each end of them, one on the front and one on the rear.
- Spray penetrating oil on the bolts and let them soak for a few minutes to loosen them.
- Use a wrench or a socket set to remove the bolts from one end of them. You may need to use another wrench or a pry bar to hold the nut on the other side of the bolt.
- Repeat step 3 for the other end of the leaf spring.
- Pull the leaf spring out of its mounts and set it aside.
- Repeat steps 2 to 5 for the other leaf spring.
Installing the New Lowering Leaf Springs
With the old leaf springs removed, it’s time to fit the new ones.
- Position one of the new in its mounts on the axle and the frame. Ensure the spring is properly aligned with both eyelets facing upwards.
- Thread the bolts through the eyelets and fasten them with nuts. Tighten them just enough to keep them secure, but not fully.
- Repeat steps 1 and 2 for the other leaf spring.
- Tighten all bolts to the manufacturer’s guidelines using a wrench or socket set. To secure the opposite end of the bolt, you might need an additional wrench or a pry bar.
Reattaching Wheels and Brakes
The last step involves reattaching the wheels and brakes to the vehicle’s rear end on both sides. You can do this:
- Use a wrench or a socket set to attach the caliper onto the brake rotor with bolts
- Align the wheel onto the axle and push it in place
- Hand-tighten lug nuts onto the wheel
- Use a wrench or a socket set to tighten lug nuts in a star pattern to the manufacturer’s specifications
- Repeat steps 1 to 4 for the other wheel


Post-Installation Lowering Leaf Springs Checks and Tips
Checking Alignment and Ride Height
You need to check your vehicle’s alignment and ride height. Alignment refers to the proper positioning of your wheels to one another and the steering system. Ride height is how high or low your vehicle sits on its suspension.
To check your alignment and ride height, you need to:
- Remove the jack stands from under the vehicle and lower the jack until the vehicle rests on the ground
- Measure the distance between the center of the wheel hub and the fender lip on each wheel. This is your ride height. Compare it with your desired ride height and make sure it is even on both sides.
- Take your vehicle for a brief drive and assess its steering, handling, and braking. If you detect any pulling, drifting, or vibrations, the alignment might need adjustment. You may need to take your vehicle to a professional mechanic for an alignment adjustment.
Test Driving and Fine-Tuning
The final step is to test drive and make any necessary fine-tuning. Test driving your vehicle will allow you to experience how it performs with its new suspension system. Fine-tuning your vehicle will allow you to make any adjustments or modifications that may improve its performance or comfort.
To test drive and fine-tune your vehicle, you need to:
- Drive your vehicle on different types of roads and at different speeds. Pay attention to how it feels, sounds, and responds.
- If your vehicle’s performance and comfort meet your expectations, enjoy your lowered ride. Otherwise, consider making some of the following adjustments:
- Adjusting air pressure in tires
- Replacing shocks or struts
- Installing sway bars or anti-roll bars
- Installing camber or caster kits
- Installing bump stops or limit straps


In wrapping up, mastering the art can dramatically transform the stance and performance of your vehicle. By following this comprehensive guide, not only will you achieve a sleeker appearance, but you’ll also ensure that the process is done safely and efficiently. Keep in mind that each step is vital, and meticulous attention ensures optimal results. With your vehicle now boasting its new lowered stance, you’re ready to hit the roads with both style and confidence.


